


Composting Simplified: How to Turn Waste into Gold
A Beginner-Friendly Guide to Composting Success, Even Without a Big Pile.


There's a good chance you've got a gold mine sitting in your kitchen trash can right now. Banana peels, coffee grounds, last night's wilted salad — it's all future fuel for your garden, and turning it into rich, dark compost is easier than most people think.
You don't need a degree in soil science or even a big pile. Just a basic understanding of how decomposition works and the willingness to let nature do it’s thing.
The Only Formula You Need to Remember
Composting comes down to balancing two types of materials: "greens" and "browns." Greens are nitrogen-rich. Think kitchen scraps, fresh grass clippings, coffee grounds and yes, that chicken coop bedding you've been meaning to deal with. Browns are carbon-rich: dry leaves, straw, shredded cardboard and newspaper.
The magic ratio? Three buckets of browns for every one bucket of greens. You don't need to weigh anything or pull out a calculator. Toss in your scraps, cover them with a generous layer of dry material and you're already doing it right.
Moisture matters too, so your pile should feel similar to a wrung-out sponge. Damp, but not dripping. If it's too dry, nothing happens. Too wet, and you'll know by the smell.
Pick a Method That Fits Your Life
Here's the secret that seasoned composters won't always tell you: there's no single "right" way to do this. The best method is the one you'll actually stick with. Here are a few worth considering.
Trench composting is about as simple as it gets. Dig a hole or trench about 12 to 18 inches deep, toss in your kitchen scraps, cover with six to eight inches of soil and walk away. No bin, no turning, no monitoring. The scraps break down underground where pests can't reach them, and the nutrients feed the root zone directly.
The catch? You can't harvest the compost separately, and you'll want to wait a few months before planting above the trench. But if you've got garden rows to rotate — and most acreage owners do — this is a near-effortless way to build better soil over time.
Bin or pile composting is the classic approach. You can build a simple bin from wire fencing or wooden pallets for next to nothing, or pick up an enclosed plastic bin if aesthetics matter. Layer your greens and browns, keep things moist and turn the pile every week or two with a pitchfork to introduce oxygen. A pile at least three feet on each side will generate enough heat to break down materials in a few months. Smaller piles work too, they just take longer.
If you've got livestock, you're sitting on a composting jackpot. Horse bedding, goat straw and rabbit droppings are all excellent material. Just compost chicken manure before applying it, since it runs hot with nitrogen and can burn plants.
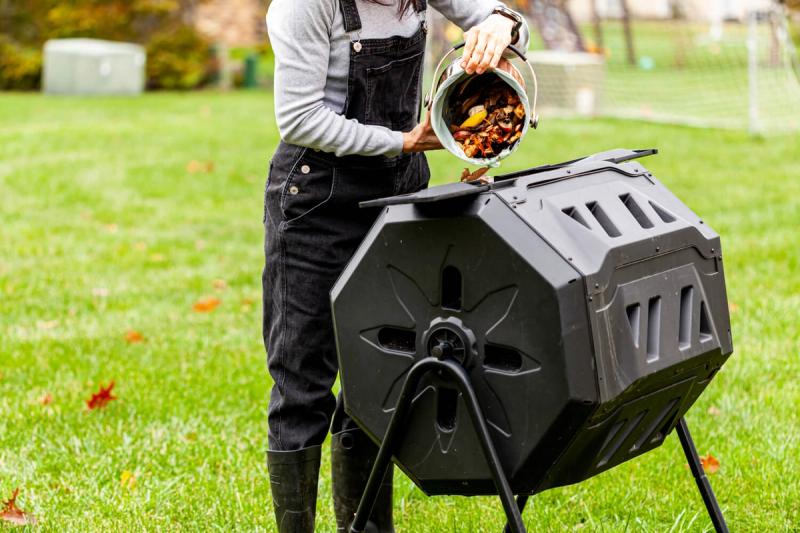
Tumbler composting is worth a look if pests are a concern or you'd rather not wrestle with a pitchfork. These sealed, rotating drums keep critters out and make turning as easy as spinning a barrel. They won't produce compost as fast as manufacturers claim (you should plan on a few months rather than a few weeks), but the convenience is real for smaller properties.
Vermicomposting is composting with worms and works beautifully for kitchen scraps and can even happen indoors. Red wiggler worms in a shallow bin with damp shredded newspaper bedding will quietly process your food waste year-round. A pound of worms eats roughly half a pound of scraps per day and produces incredibly nutrient-dense compost. Keep the bin in a garage or shaded porch where temperatures stay between 55 and 77 degrees Fahrenheit, and skip the citrus, onions and dairy.
When Things Go Wrong (And How to Fix Them Fast)
Most composting problems come down to one thing: too many greens, not enough browns. If your pile smells similar to ammonia or looks slimy, add a thick layer of dry leaves or shredded cardboard and give it a good turn. Problem solved.
A rotten-egg smell usually means the pile is waterlogged. Add browns, turn it to get air flowing and cover it during heavy rain. If your pile seems to be doing absolutely nothing, it's probably too dry. Give it a good soak and mix in some fresh green material.
One more tip that saves a lot of headaches: always bury food scraps under a layer of browns. Exposed kitchen waste is an open invitation for raccoons, rodents and flies. Out of sight, out of mind — for the pests, anyway.
What Stays Out of the Pile
Most fruit and vegetable scraps, eggshells, coffee grounds, yard trimmings and shredded paper are fair game. But a few things should stay out.
Meat, dairy, fat and bones attract pests and create odor problems in open piles. Dog and cat waste can carry pathogens that home composting won't reliably kill, although rabbit and guinea pig droppings are fine. Skip diseased plants and weeds that have gone to seed unless you're running a hot pile that consistently hits 130 degrees Fahrenheit or above.
And here's one especially important for acreage owners: if you've treated your pasture or lawn with herbicides, keep those clippings out. Persistent residues can survive composting and damage your garden plants down the line.
Your Soil Will Thank You
Here's the payoff that makes all of this worthwhile: compost improves soil structure, boosts water retention and feeds the billions of microorganisms that keep your soil alive and productive. Considering that food scraps are the single largest material category in U.S. landfills, every banana peel you divert actually counts.
You don't need to get everything perfect on day one. Start with a trench beside your garden bed or a simple wire bin behind the barn. Toss in your scraps, pile on your browns and let the microbes go to work. Before long, you'll have a steady supply of the richest soil amendment money can't buy, because you made it yourself from stuff you were throwing away.
Tags:Garden & Landscape


Acreage Life is part of the Catalyst Communications Network publication family.