Growing the Amazing Elderberry
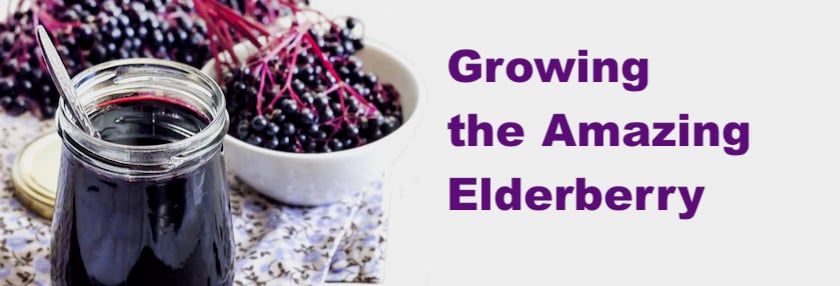

Adaptable, prolific, useful, and healthful—what’s not to like?
A surprising, helpful remedy re-discovered last year during the COVID-19 crisis was the use of elderberry syrup to help soothe a cough and build some strength. And it’s centuries old!
The American Elderberry (Sambucus canadensis) is a beautiful fruit-bearing large shrub that can have a place on any rural property. Easy to grow, fun to harvest, and delicious to eat, the elderberry is tailor-made for the modern homestead.
The American Elderberry is native to the eastern half of the United States. While foraging for wild edibles is a wonderful way to spend time outdoors, I live in North Dakota where elderberry does not grow wild. If our homestead, Cottonwood Bend Farm, wanted to experience elderberry, we would have to grow our own. Fortunately, it is a very adaptable plant.
Growing
Many elderberry growers start from cuttings, but we went a different route. My day job is with a Soil Conservation District, and part of our work is bringing low-cost conservation grade bare-root trees to the public.
Among the myriad of tree and shrub species we handle are Elderberry. I purchased a bundle of 25 shrubs and went to find a place for them at home. In addition to the standard American Elderberry, there are cultivars that have been bred for increased fruit production, height, and sweetness. The cultivars generally carry a higher price tag.
Elderberry are great for preventing soil erosion, as they do well in the wetter margins of landscapes.
I am a firm believer in using landscape fabric for new tree and shrub plantings, as it helps keep down weeds as well as conserving moisture. After rolling the fabric out over freshly tilled soil, we planted.
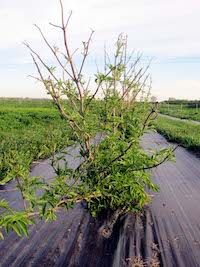
Planting bare-root shrubs is a breeze, requiring nothing more than a shovel and some sweat. After cutting holes in the fabric, we dug holes deeper than the height of the roots. Dropping the healthy shrubs into each hole, it took little effort to tamp in the fresh soil. A dose of water and the work was done.
The growth rate the first year is quite rapid. Ours grew more than 2 feet the first year, erupting from the sad-looking dormant stem into a riot of compound opposite, saw-toothed leaves that looked vaguely tropical. There were no flowers, but I hadn’t expected there would be so early in their life.
An October snowstorm brought the first frost to the region, and the shrubs went from beautiful to heartbreaking. The leaves hung limply and brown, never falling off. We were sure they were goners.
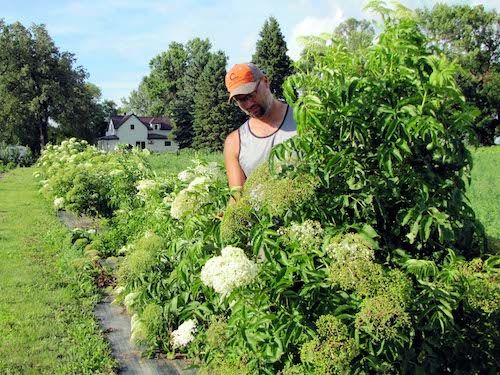
Fortunately, the following spring they showed no signs of stress and again grew rapidly. By the time the beautiful white flowers attracted enormous numbers of pollinating insects, most of the row stood over 6 feet tall!
Harvesting
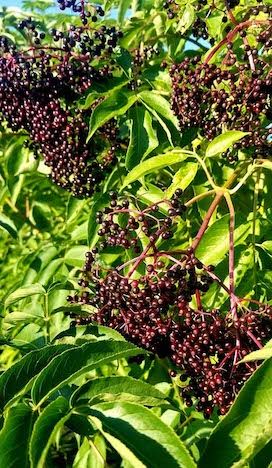
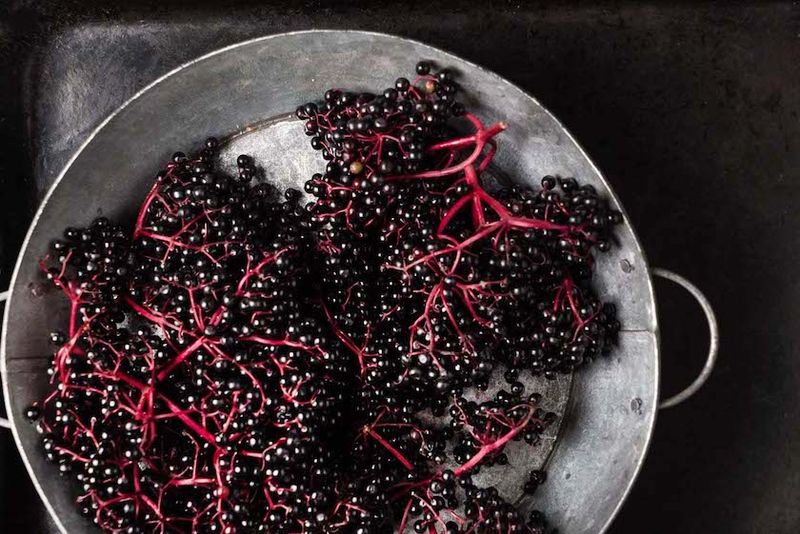
The delicate sprays of flowers turned into small green berries, segueing into light purple. By the middle of August, some of bunches of fruit had turned from light purple to dark, almost black.
Elderberry fruit does not ripen at once. It is very common for a single shrub to have sprays of flowers, green bunches and ripe bunches all at once. While this helps the plant ensure propagation regardless of freak weather occurrences, insect infestations, or animal depredation, it does make for more difficult harvesting. We got in the habit of walking the row every other day.
We learned quickly that the purple fruit is not ripe.
A single berry, squished between the finger and the thumb, showed a watery, almost translucent juice. The nearly black fruit, in contrast, produced a berry full of dark, port wine-colored juice. Fully ripe clusters will also hang facing downward, as they are heavy with juice.
Picking each individual berry is nearly impossible—it’s much easier to simply cut each spray of fruit at the base of the stem with a sharp scissors. We place the sprays of fruit in a plastic grocery sack. Once the sack is full, tie it shut and place in a freezer for at least 24 hours.
Place a frozen spray of berries in a large Ziploc-type bag. Give the bag a sharp whack against a hard surface like a table or countertop and the frozen berries will pop free of the stem. Toss the stem and keep smacking sprays until your harvest is complete.
Some micro-stems may remain in the bags, but they can be floated out of harvest by placing the fruit in a large bowl of water. Unripe berries will also float. Once the berries have been cleaned, drain the water and they are ready to use fresh.
We use very little of the fruit fresh, instead freezing the whole berries for later use.
Preparing
Important: Elderberries should be cooked before consuming.
Raw elderberries, especially European varieties, should not be consumed as the seeds contain a cyanide-inducing glycoside. There is some evidence that American elderberry contains much less of the chemical, but it is always better to be safe than sorry.
We use elderberry in a few different ways. The first, and the clear favorite among the kids, is syrup.
Elderberry syrup is quite easy to make. Place 4 cups of fresh or frozen elderberry in a saucepan or pot. Add 3 cups of water and simmer for around a half an hour. Mash the berries occasionally with a potato masher or heavy spoon.
Pour the berry slurry through a fine meshed sieve, collected the juice in a bowl. The juice can be further refined by straining it again through cheesecloth.
At this point there should be around 3 cups of juice. Add a half cup of lemon juice and simmer, reducing the juice to a syrupy consistency. It can then be poured into pint jars and processed in a hot water canner for 10 minutes.
Enjoying
The syrup is delicious on pancakes and ice cream, or mixed with club soda to make elderberry soda. While I’m not a doctor, my significant other Melanie and I took a shot of elderberry syrup each night over the winter and never felt better.
A more adult use is for elderberry liqueur. It is even easier to make than the syrup.
We use a large pickle jar and add four cups of frozen berries to the bottom. Pour a quart and a half of vodka over them and place the jar in a cool, dark place. Give the jar a shake every week or so, and after at least one month, or even a couple months, pour the contents through a cheesecloth-lined sieve. Add a third to a half cup of sugar and stir. Place back in the jar for another couple weeks.
I find it’s too strong for me to drink straight, but is excellent with tonic water or as a cocktail mixer.
A quick Internet search provides recipes for elderberry wine, jelly, jam, gummies, tincture, mead, and cake. We are looking forward to trying the myriad of different recipes for this super fruit.
We also had a tremendous amount of interest in purchasing the frozen elderberries in our local community. Elderberry is hard to come by, and dried berries sell for an absurd amount on the Internet. Using our Facebook page, we were able to sell every pound of berries we didn’t use ourselves.
What about health claims?
Lindsey Christianson has dubbed herself the Elderberry Queen after starting her organic elderberry syrup company. Her website (elderberryqueen.net) offers how her children were often sick, bringing illness after illness home from school…until she decided to buy elderberry syrup for them.
“My kids went from constant colds, flu and asthma to healthy kids,” she writes, “rarely missing any school.”
Elderberry syrup is thought to improve immune system response due to the antioxidants found in the berries. Tinctures, teas, and other formulations apparently carry these through to improve immune response, as well.
Tags:Features

Acreage Life is part of the Catalyst Communications Network publication family.


